This tutorial will show you how to create from zero a simple enemy with the MOG2 EDITOR. The enemy that we are going to create is a WORM (remember those worms of the first rooms of MoG?).
STEP 1: Creating the graphics
STEP 2: Adding the graphics to the
project
STEP 3: Creating the WORM OBJECT
STEP 4: Defining the ANIMATIONS
STEP 5: Defining the BEHAVIOUR
STEP 6: Testing the WORM
1.1 - Create the graphics for your objects in a PCX/GIF/BMP or whatever graphic file using whatever drawing program (I recommend you to use Deluxe Paint, that is quite old, but allows you a great control at pixel level). You should draw all the bitmaps (one for each position of your enemy) and the transparency and collision masks. You should have something like this (you can use the enemy1.pcx in the "graphics/alternate" folder for following this tutorial instead of drawing your own):

Notice that you should draw two masks for each bitmap: the first one is the transparency mask, and the second one is the collision mask. A white colour in the transparency mask means opaque, and a black colour means transparent. If you use grey colours, they mean semi-transparent pixels. The collision mask is just more discrete: black means no collision and non-black means collision.
1.2 - Copy your graphic file to the folder "graphics/***" inside the editor (where *** is the graphic set name, e.g.: "alternate").
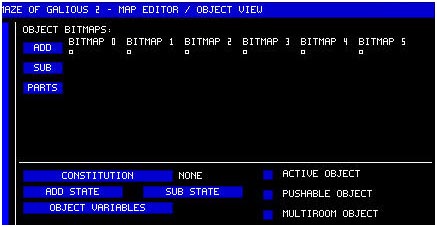
2.1 - Go to the OBJECT VIEW in the editor.
2.1 - Select the BITMAP BANK where you wish to add the BITMAPS. You should organize your bitmaps in a proper way. For instance, a good policy can be: a bank for the castle background graphics, and another bank for the world graphics. Then a bank for popolon/aphrodite graphics, a bank for the misc graphics (shrines, etc.) a bank for the items, a bank for each one of the BIG demons, and some banks for the enemies (grouped by areas or whatever). However, for following this tutorial, just select an empty bank.
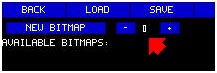
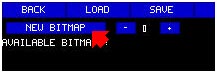
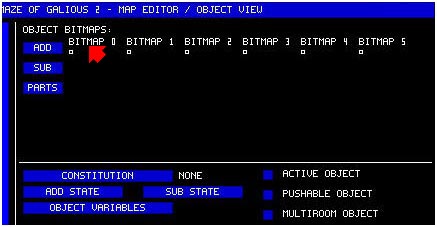
2.2 - and click in the "NEW BITMAP" button (on the top-left part) to add bitmaps:
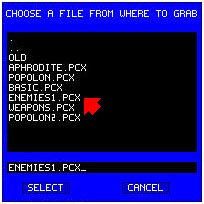
2.3 - Select the graphic file that you have created on the STEP 1:
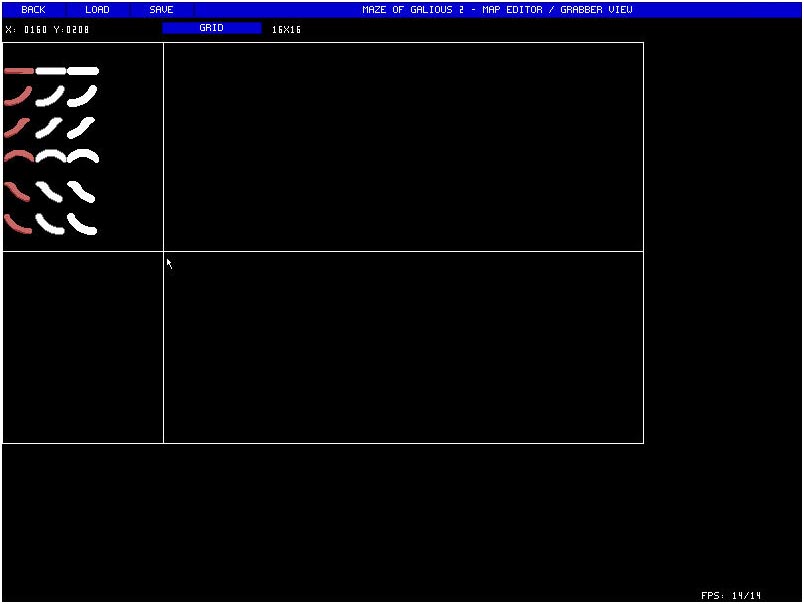
2.4 - Grab all the bitmaps from the image. To comfortably grab the bitmaps, select a 16x16 or a 32x32 grid. Then start grabing bitmaps by clicking first on one corner of the bitmap and then on the second corner. This is the grabber screen:
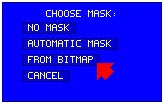
2.5 - After each bitmap you select, the program will ask you to "CHOOSE MASK". This is to select the transparency mask. You have several options: "NO MASK" means that the object is completely opaque. "AUTOMATIC MASK" will take all black pixels as transparent and the rest as opaque, and "FROM BITMAP" will use the mask that you have provided in the bitmap. Select "FROM BITMAP". After selecting the mask, grab the next bitmaps. Once you have finished grabbing all the bitmaps press "BACK" (on the top-left corner).
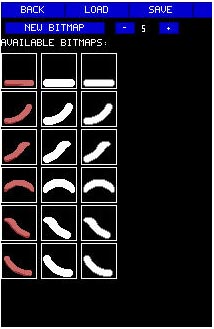
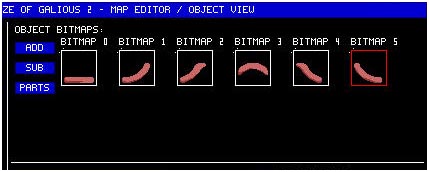
2.6 - Returning to the OBJECT view, you will see that all the new bitmaps have been added to the project. You should see a list of bitmaps like this one:

2.7 - Each bitmap has three boxes: bitmap, collision mask and transparency mask. Notice that the collision mask is still not present. To add it, right click on the bitmap and select "ASSIGN COLLISION MASK". Then you will have again several options: "NO COLLISION", representing an object that you can pass through; "FULL COLLISION" are objects with a square collision mask around them; "FROM BITMAP" uses the collision mask that you have provided on the graphic file and"SAME AS TRANSPARENCY" uses the transparency mask as the collision mask. Select "FROM BITMAP". Do this for all the bitmaps. You should have now this result:
Once you have done this. All the graphics are in the project and you are ready to create the WORM!
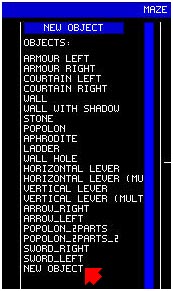
3.1 - Click on the "NEW OBJECT" button (mid-top of the screen), and a new object with the name "NEW_OBJECT" will be created (if there is actually an object with that name, the object will be called NEW_OBJECT_1, etc.):
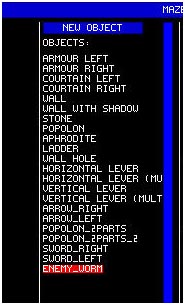
3.2 - Right-click over it and select "EDIT NAME". Then enter the new name for the object. Let's call it "ENEMY_WORM". Now the object list should look like this:
3.3 - Select the ENEMY_WORM object (by left clicking it). On the right part of the screen you will see the details of the object, but as we still haven't edited anything of this object, there is no information to show. The next step is select which of all the available bitmaps is this new object going to use. To make this, click 6 times (as the worm animation has 6 teps) on the "ADD" button on the right. You should see this as the result:
This means that the object is going to use 6 bitmaps, but that we still haven't selected which of them.
3.4 - Click on the first bitmap:
The small square under it should change to RED colour. This means that the bitmap is selected.
3.5 - Now if you click on any of the bitmaps of the leftmost part of the screen, you will see that the small square under the "BITMAP 0" text contains now the bitmap that you have selected. Assign one of the animation steps of the WORM to each one of the bitmaps using this procedure. The result should be this one:
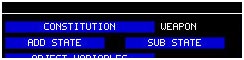
3.6 - The next thing is to define the type of object that we are going to define. There are several types of objects, identified by their constitution, that can be: NONE, SOLID, WEAPON, LADDER or CHARACTER. NONE is the constitution of the background objects, SOLID is the constitution of the walls and stones, WEAPON is the constitution of all the objects that can inflict damage (including enemies), LADDER and CHARACTER are obvious. To change the constitution of an object, just press the "CONSTITUTION" button until we obtain the desired one. Select the WEAPON constitution for creating the WORM:
4.1 - Let's focus now on creating the behaviour of the WORM. The behaviour of a worm is relatively simple: a worm moves in a straight line until it reaches the end of the platform where it is or until it collides with a wall or until it reaches the end of the room. When one of these three conditions is met, the worm changes the direction of the movement. Therefore, the first thing we see is that the worm will have two states: one for moving right and another one for moving left. Let's start creating those two states. To make that just press twice the "ADD STATE" button. We will obtain the following result:
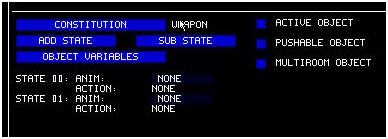
4.2 - Notice that each state has two scripts: "ANIM" and "ACTION". They identify both the animation script an the action script for an object on that state. Initially, both scripts are initialized to the "NONE" script (i.e. no animation and no action). To change a script, just click over it. Let's start with the animation for STATE 0. Click on the "NONE" just on the right of the "ANIM" label of STATE 0.
4.3 - The animation script editor will open:
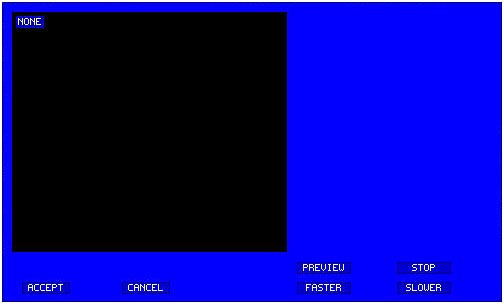
On the BLACK part you will see the current script. And on the
right part, you have the preview zone. You can preview the
animations that you are editing just by clicking on the "PREVIEW"
button, and stop them with the "STOP" button. You can also
control the speed of the animation. Once you have edited your
SCRIPT, just click on ACCEPT to return to the OBJECT view.
To change a command of the animation, clik over it, and a list of
the available commands will appear. If you click over the "NONE"
command the program will present you the list: NONE, SINGLE, SEQ,
LOOP, GSEQ, GLOOP or CANCEL. As the animation of the worm is a
simple loop of all the frames, select the "LOOP" command, you
will get this:
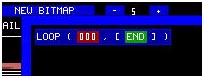
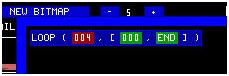
4.4 - The LOOP command has 2 parameters: the SPEED of the animation and the LIST OF BITMAPS to loop. A good speed for the animation of the WORM is 4, so click over the "000" and change it for "4":
4.5 - The second parameter is a list of bitmaps, by clicking on the "END" button, you can add bitmaps, so click it once to add one bitmap:
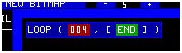
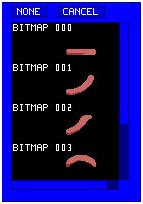
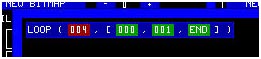
4.6 - Each bitmap is a number, that identifies a bitmap from the list of available bitmaps for the WORM object. The first frame of the animation will have exactly the bitmap 0, so no changes have to be made. So, click again on the "END" button to add a second bitmap. The second frame of the animation has to contain the bitmap 1, so click on it. A window with all the available bitmaps will be shown to you. Select the "BITMAP 1"
You should get the following result:
4.7 - Continue adding frames until you get the sequence: [0,1,2,3,4,5,0], if at some moment the script is so big that it doesn't fit on your screen, just use the scroll bars, and if for error you create some frames that you want to delete, you can delete them by right-clicking over them. If you want to remove the last 0, you can. However, I like more the animation adding the last "0". To test the animation, just press the "PREVIEW" button on the right (if you want). After finishing the animation, press "ACCEPT", and you should get this:

Notice that now, instead of "NONE", you have the "LOOP (..." label in the animation.
4.8 - Edit also the animation of the state 1, but create the sequence in the inverse order (because in the state 1, the worm is moving to the left): [0,5,4,3,2,1,0].
5.1 - Let's focus now on the behaviours. As we have said
before, in the state 0, we want the WORM moving to the right
while three conditions is met:
- The WORM doesn't collide with a wall.
- The platform where the WORM is moving doesn't end.
- The WORM doesn't reach the border of the room.
To edit the action script of a state, just click over it. Click
over the "NONE" by the "ACTION:" label of the state 0, and the
ACTION SCRIPT EDITOR will be presented:

As in the animatino editor, the SCRIPT is presented on the top-left part of the window. The right part of the window shows the variables accesible by the script, but for creating the behaviour of the WORM we are not going to use them.
5.2 - The behaviour that we have described above implies moving the WORM while some conditions are not met, so let's start by creating a "WHILE" command. Click on the "NONE" command and a list of commands will be shown: NONE, SEQ, PARALLEL, IF, WHILE, DO, PAUSE, TERMINATE, TERMINATECHILD, STATE, MOVE, CREATEOBJECT, CREATECHILD, CREATELUEDCHILD and CANCEL. Select the "WHILE" command and you will obtain this:

5.3 - The WHILE command will execute an ACTION while a CONDITION is true. The action that we want to perform inside the WHILE statement is to move the object, so change the "NONE" command by a "MOVE" command:

5.4 - The MOVE command has 2 parameters: the X movement and the Y movement. An X movement of 0 means no movement, and a movement of 100 means to move 1 pixel to the right (therefore you can set for instance a movement of 25 for instance, identifying a movement of 1 pixel each 4 frames). As in the state 0 the WORM moves to the right, set the first parameter to 100. To change the value of the parameter, click over it. A dialog will be shown that allows you to select the type of the value: INTEGER, STRING, KEY or VARIABLE. For now, select INTEGER and enter 100.

Notice that the the SCRIPTs are shown to you surrounded by boxes: a BLUE box surrounds ACTION commands, VIOLET boxes surround CONDITIONS and RED boxes surround VALUES.
5.5 - Let's set the condition now. We have said that three conditions have to be met for the movement, so we will have some thing like "condition1 AND condition2 AND condition3". Click on the "TRUE" box and the list of condition commands will be presented: TRUE, FALSE, NOT, AND, OR, TIMMER, COLLISION, INSIDE_ROOM, KEYPRESS, KEYPRESSED, EQ, GR, GREQ, LW and LWEQ. Select "AND". As in the animation "loop" command, a list ended by a green "END" is presented, click once on the "END" to add a new condition, so that we have an AND of 3 conditions:

5.6 - Let's fill the conditions. The first condition was that the worm doesn't have to collide with walls. So, click on the first "FALSE" and change it for a "NOT":

5.7 - Then substitute the "FALSE" inside the "NOT" by a "COLLISION" command with parameters 100 and 0:

The COLLISION command has 2 parameters: X and Y. The command will return a TRUE value when the object collides with a SOLID object if moved (X/100,Y/100) pixels. Therefore, a command COLLISION(100,0) will be true if the WORM collides with a solid object if moved one pixel to the right. The combination NOT(COLLISION(100,0)) is true when the WORM doesn't collide if moved one pixel to the right, i.e. when it has still space to move to the right before colliding (exactly the condition that we wanted)
5.8 - Let's go for the second condition: "The platform where the WORM is moving doesn't have to end". To test if the platform where the worm is moving ends or not, we can mke a tric: If the object doesn't collide if moved 32 pixels to the right (the width of the WORM) and 16 pixels down (some value smaller than its height), this will mean that there is a hole there. Thus indicating that the platform in which the WORM is moving ends. Therefore, we can add the following condition: COLLISION(3200,1600)

5.9 - The third condition is: "The WORM doesn't reach the border of the room". To test this, there is a special command: "INSIDE_ROOM", that has also two parameters: X and Y. The command is true when the object is still completely inside the room when moved (X/100,Y/100) pixels. Therefore, if we add the condition: INSIDE_ROOM(100,0), we are exactly testing what we want:

5.10 - While the three conditions are met the WORM will move to the right, but what if some condition is not met? What we want to happen is that if some of the conditions is not met, the WORM should change to the state 1. To do that, right click on the WHILE command and select "INSERT AFTER" and you will obtain the following:

5.11 - The SEQ command that have appeared on top of the WHILE is a command that executes in sequence all the commands that you add to it (you can add more commands to the sequence by clicking on the green END button). When the condition of the WHILE command is not met, the WHILE command ends, and the next command of the sequence will be executed. As we want to change to the state 1, we will change the "NONE" command by a "STATE 1" command:

This is the FULL script for the state 0. Isn't it simple?
5.12 - Go to the action script of state 1 and enter the following script:

Notice that it's almost the same script as for the state 0, but now the movement is negative (-100). For entering a negative number, just press the - key while editing the number, and the number will switch from positive to negative or vice versa. Once you have entered that script, the WORM is complete!. There are still some things laking: the interaction with the WORM is not defined (it has to die when colliding with the sword of popolon or with an arrow or whatever), but as the interactions are still not implemented on the current version of the editor (0.4) I will not explain how to complete the WORM. However, the worm that you have created can be tested (but not killed).
6.1 - Go to the ROOM edit screen, select a GRID of 16x16, EDITING = background, MODE = place, select the OBJECT "ENEMY_WORM", and place a couple of worms on some room (check the "room creating tutorial" for help on this step). Here you can see a screenshot of a room with a couple of worms:

6.2 - Click on the "PREVIEW" button, select a character and look at your worms moving around the screen!!
